This post may contain affiliate links that grant me a small commission at no extra cost to you.
I got a vintage embroidery book and hoops for Christmas. Here's what I've learned so far!

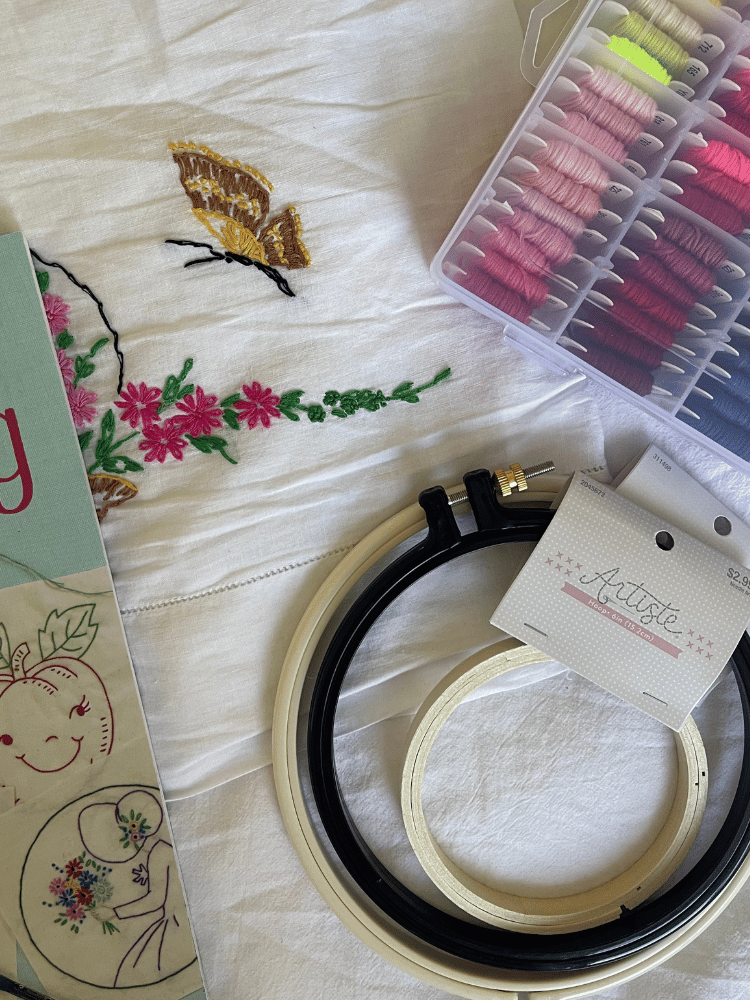
I'm always interested in learning new hobbies and for Christmas this year I was so excited to receive an embroidery kit, a vintage embroidery pattern book, and some embroidery hoops! One of my favorite things to thrift last year was hand embroidered tea towels and pillowcases. I thought to myself how wonderful the art of it is and how many women used to work on their stitching to pass time and sharpen their skills.
I've already learned how to crochet and sew so I decided my next venture will be embroidery. I also got some knitting needles and yarn for Christmas but that's for a different blog post...
I love hobbies that are creative but also fun to do while watching movies or shows. It's really fun because it takes your mind off things for a while and it feels really good to create something purely for the sake of creating it! I think things like sewing, crocheting, knitting, and embroidery are increasingly becoming lost arts in a way. I mean, when we're bored we're all guilty of turning to our phones or social media to entertain us. It's something I've been trying to be more conscious about.
I've always been embroidery-curious in that it always looked really fun, but there seemed to be a lot of stitches to learn and a lot of people hand-drawing on their designs. One of my biggest weaknesses creatively is drawing - I just didn't get that gene! Nonetheless, when I started thrifting hand embroidered vintage pieces, I thought to myself that it didn't look that hard. It's not like the designs were the Mona Lisa. Mostly simple, lovely designs of cute kittens, puppies, flowers, fruits, etc. Of course, there are differing degrees of vintage embroidery pattern difficulty, but it seemed a little more accessible.
I also recently saw a video of someone embroidering a simple heart and two initials on the bottom of her rehearsal dinner dress for her wedding and I thought it was perfection! Another reason to learn the skill.
Fast forward to Christmas-time making my blog post about unique vintage gifts for her and I came across the CUTEST vintage embroidery pattern book. For $15! I added it to my own Christmas list and it was under the tree for me. I was so excited.
In today's blog post, I'll share my process of learning simple embroidery as a total beginner. I'll let you know what materials I used, what vintage patterns I used, what I learned, and what I made!
First, some frequently asked questions about vintage hand embroidery:
Vintage embroidery, or vintage hand embroidery, involves stitching a design on a piece of fabric with colorful thread. Vintage embroidery typically involves vintage designs/patterns that were popular from the late 1800 through the 1950s.
Vintage embroidery differs from regular embroidery only in the design. It may also differ in colors used and stitches used. Vintage embroidery is also called decorative embroidery or art embroidery.
Vintage embroidery has a fascinating history. Needlework has been used as a past time for many women through the centuries, and vintage embroidery was no different. It was a way to pass the time and create something beautiful. Over time, the "simple" designs used by women in the early to mid 1900s were abandoned for more complex artistry, and embroidery machines have been able to embroider fabric in a fraction of the time and with much more complexity than a human.
For more information on the history of embroidery, Suzanne McNeill's book Vintage Stitching Treasury is a great resource. I used her book as my guide for this project.


Embroidery in general is typically decorative. Vintage embroidery was commonly used to brighten up pillowcases, table runners, tea towels, blankets, etc. Embroidery makes for a great gift, ornament, or framed treasure.
Vintage embroidery can be done with any type of material. A non-stretch cotton material works best so that the fabric does not stretch out of the hoop as you are stitching, but you can always use some fusible material on the back to prevent stretching.
You can do vintage embroidery on clothing, pillowcases, table runners, tea towels, blankets, etc. You can also simply embroider fabric and leave it in the hoop as a decoration or give it as a gift in a frame.
Another thing I really like about embroidery is that you can use scraps of fabric that you have lying around. For a lot of my sewing projects I don't know what to do with the additional fabric, embroidery is a great solution.
I have personally used the vintage patterns in this book. They are adorable and only $15. Plus, the book comes with detailed instructions of how to get started with embroidery and some vintage embroidery history. Well worth it in my opinion!
Note that the book requires tracing. The patterns are not iron-on, but I like it that way because you can use the patterns over and over again! I'll tell you how I transferred the patterns onto fabric below.
There are a lot of different vintage patterns out there, though, so whatever you can find will work!
I also came across these cute pre-stamped kitchen towels with kittens on them. They don't come with any of the materials to embroider, but they have the pattern printed on them already!

You can be a total beginner. Before today I had absolutely no clue how to do embroidery. It's actually one of the easier skills to learn I think and is pretty affordable!
There are many commonly used stitches for vintage embroidery. For the sake of today, I only learned the backstitch. It's super easy to learn and looks great. If you're just starting out, I would definitely recommend starting with that stitch. The book that I recommended also comes with instructions on how to do the most common stitches. What I've learned is that there isn't ever one way to do an embroidery pattern. As you learn more stitches you can incorporate them into your projects. To make your life easier, I would recommend picking one stitch to learn and build from there!
It depends on your skill level and your pattern/the complexity of your design. But I found embroidery to be a lot faster than some other hobbies like knitting or crocheting. It definitely can take a few days if you had a complex pattern, but I was able to finish both my projects in a few hours. I'm sure I'll get faster as I learn more.
Vintage embroidery can be as cheap or as expensive as you would like it to be, but I would say that embroidery is generally one of the cheaper hobbies I've tried. Embroidery hoops are a few bucks each, thread is less than a dollar, fabric can be as cheap as you want (you can even use an old t-shirt), and you don't even need patterns.
There are also embroidery kits that are pretty cheap where you can get the exact pattern and amount of thread you'll need (so you're not getting a bunch of colors you'll never use). Those are always good to buy for starters because you will be able to see if you like embroidery first.
This is an example of the kit that I came across. It comes with the hoop, needles, pattern, fabric, and instructions if you want to make it super easy. YouTube is also a great resource to look up any stitches that you may not know how to do!

"Great for beginners. This is my first one and I’m enjoying it so much! I researched some of the stitches on YouTube and that is extremely helpful. Can’t wait to see it finished!"

Here is a list of absolutely everything I used in this blog post. That being said, you can always use whatever you find at you craft store.

"Great value for money! 10/10 would recommend to a fellow beginning embroiderer."
This embroidery kit truly has everything you need to get started. I got the "Large" version which comes with the box and a variety of thread pre-wrapped around the cardboard spools. It also comes with a seam ripper, a bunch of needles, a pincushion, scissors, and much more! I absolutely think this is a great price for this. If you went to the craft store and bought all of this separately you would be paying way more!
This kit doesn't come with hoops (at least the version that I got) so keep that in mind.

"Great vintage designs. Can’t wait to get started. Great ideas and instructions. Remember some of these from my grandmother’s work."
I really can't say enough great things about this book! It has a bunch of vintage embroidery patterns and some brief background and history of vintage embroidery. It also goes over basic instructions on how to embroider and how to take care of vintage linens!
If you are an experienced embroiderer, this book doesn't come with iron-ons as I've mentioned previously. You have to trace the pattern and then put it on your fabric. I personally think this is a plus because you can use the patterns over and over again.
Another thing to keep in mind is these patterns don't come with individual instructions as to what stitches to use where. This can make it a little more difficult as a beginner, but if you're down to experiment you'll be totally fine!

"These were great for my daughter who recently started embroidery. This is a great deal and great price. She has been using them for a couple months and she still loves them."
Since I got my hoops for Christmas, these aren't the exact ones I used, but I used a 6 inch and a 4 inch hoop that I believe were from my local craft store. One of them is bamboo and the other is plastic.
I don't think it matters which kind of hoop you use. Both work great. They're also pretty easy to thrift in the craft section. Keep in mind the sizing is up to you as well. You'll want a hoop large enough to hold the majority of your pattern. If you're freehand drawing the smaller the hoop the less room you'll have to fill up.

"Brilliant scissors, cut everything."
One craft splurge that I think everyone should have is fabric scissors. Buy them once and only use them on fabric and your life will be sooo much easier. We'll use these scissors to cut our fabric down to hoop size.

"Reynold's parchment paper is perfect for crafting."
Okay, so I used parchment paper as tracing paper because it's all I had on hand. The pattern book that I mentioned earlier gives detailed instructions how to iron-on the pattern, but frankly I just decided to trace and be done!
I think tracing paper might work even better but hey, you gotta use what you've got!

"I love these marker-like very fine-tip ended pens."
You'll also need a pencil and/or fine tip pen to draw your pattern on your fabric. I have these and I thought the black one worked really well. The only disadvantage to using marker is that you can't erase it if you mess up. Pencil is better for mistakes but it's harder to see on patterned or darker fabric.
I use these pens for journaling too and I love them!

"Great quality and packaging. Very happy with this purchase. Will buy again."
The nice thing about embroidery is it doesn't take a ton of fabric. 1 yard should last you a long time. I personally used fabric scraps that I had saved from sewing projects, but next I want to buy a yard of off-white fabric. True white can be a little stark, so cream/ivory works great (or so I hear!).
It's fun because you can use cool patterned fabric for your embroidery to switch things up!


Okay, now that you know all my materials, let's talk about what I did! I decided to start with a freehand drawing first. Something super simple. I took an old piece of scrap fabric and put it in my smaller hoop (the 4 inch). I watched a few YouTube videos that taught me how to size the fabric correctly and put it in the hoop. Take out the inner hoop by loosening the screw at the top. Place the inner hoop on top of a piece of fabric you want to use and cute a square around it, leaving plenty of room left outside the circle. If your fabric is a pillowcase, piece of clothing, or something else you don't want to cut up, don't cut anything.

Now, place the fabric square over the small hoop and place the larger hoop on top. Press down, but not all the way. Tighten the screw and then slide the large hoop all the way down into place. This will make your fabric super tight on the hoop, which is what we want. Now, you can trim the edges of the fabric just a little more to keep everything clean.

Your fabric is now on your embroidery hoop! Now, lightly sketch what you want to embroider on the fabric. I used pencil for this because the fabric I used was light. It could be a heart, leaf, flower, name, etc. I decided to go really simple because I can't draw! I went with a heart and RC for Roseglass Collective.
Now you need to select your thread. I picked a beautiful light blue. Cut off about an arm's length of thread. The longer your thread the more it has the potential to become tangled. Next, split your thread. I know this sounds a little weird, but embroidery thread is meant to be split (most of the time). It's kind of nice because you sort of get double for your money. If you look closely you can see that the thread is comprised of 6 strands. For this project I split the thread into 3 strands each. You can do whatever thickness you would prefer.
You'll want to thread your needle. Pick any needle from your kit. If you didn't get the kit, any needle should do. I find it easier to work with the thicker needles. Stick your thread through the eye of the needle and line up the ends so they are even.
Next, I looked up how to embroider the most simple stitch. I found the backstitch! It's super easy to do.
Simply pick a spot on your pattern and stick the needle coming up from the back to the front. With your non-dominant hand hold the very end of the thread until you're a few stitches in. Stick the needle going from front to back a little bit further along the pattern. Come back up from back to front a little further from that spot on the pattern. Then connect the line going front to back covering that area that you left. This is why it's called the backstitch!
The backstitch is the only stitch I learned for my first 2 projects and it worked like a charm. As you learn more, you'll add more stitches into your repertoire that you can make some really cool looking pieces! But for my purposes, one stitch worked just fine.

Now just repeat that stitch all around the pattern that you've drawn. Once you're done, or you've run out of thread, simply end on the back and thread your needle through one of the nearby strings. Create a loop and pull your needle through, creating a knot. Snip the thread but don't make it too short.

Look at how cute it turned out! I know it's simple, but I'm a sucker for the handmade embroidery look. When I looked for embroidery tutorials I saw a lot of really amazing designs but sometimes it can be intimidating so I'm here to tell you that it can be super simple.

I'm not quite sure what I want to do with this design yet, but one option is to hot glue down the edges of the fabric over the hoop. The other option is to take it out of the hoop and frame it! This was my very first test fabric though so we'll see!

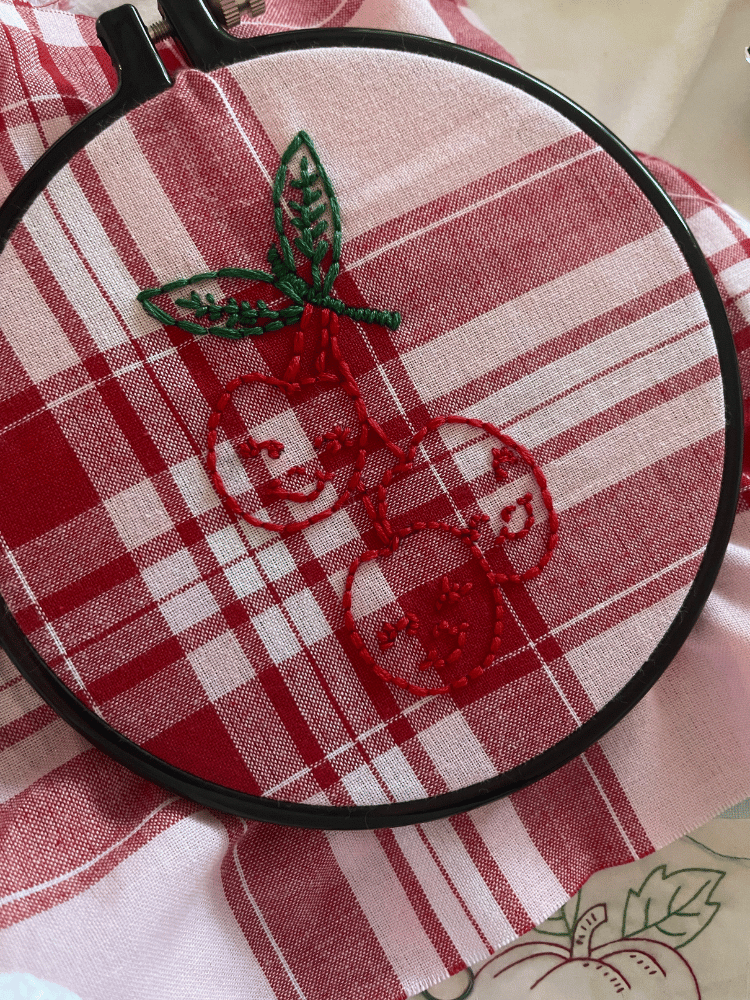
There are so many amazing patterns in the book I recommended, but I decided to go with something simple. I picked some cute cherries!
Now, I'm still not sure what stitches you *should* use in vintage embroidery, but I decided to do the backstitch throughout. I did everything the same for this embroidery as my first attempt, but I had to trace the pattern.

I placed the parchment paper on top of the pattern in the book and traced it with a pencil. I cut the parchment paper down to size and taped it to the back of the fabric in the 6 inch hoop I picked. I took my iPhone flashlight and placed it face up on a flat surface. I then put the hoop facing up on top of the flashlight and traced the pattern on top of my fabric. I hope this makes sense, but I basically created my own tracing light.

I think the cherries turned out super cute! It's a little hard to see all the detail because of the fabric I chose but I just can't help it - I love how fun patterned fabric is!

The finer details were a little difficult here, like the eyes of the cherries. I had to try a few times, but the nice part is if you mess up, you can always seam rip and start over!
I decided to fill in the stem with green and I'm glad I did. For that part, I watched a video that just said to treat filling in like you would color in a coloring book. Go line by line and back and forth.
Embroidery is so satisfying because it makes such a great sound as you work your way through. Almost like ASMR!
I still need to do some research on how to do the patterns that look more like flowers and how to do more detail work like eyes. If anybody with more embroidery experience has some insight as to the best stitches to use with vintage patterns, please let me know! When I look at pictures of vintage designs, it looks like the lines are a lot smoother. I'm guessing I'm either doing the wrong stitch or using too thick of thread? Next I'm going to try some of the stitches mentioned in the book.
Overall, I still have a lot to learn, but I really like how my very first attempt turned out. It may not be perfect, but it's a start!

Have you ever tried embroidery? Have you ever tried any vintage embroidery patterns? I would love to hear from you!