This post may contain affiliate links that grant me a small commission at no extra cost to you.
This quilted makeup bag tutorial combines two easy techniques - perfect for beginners!

I have been seeing the most aesthetic quilted makeup bags all over my Instagram, TikTok, and Pinterest lately! I love to sew and do any type of DIY project, so I thought why not make a few to give to my friends! This in-depth tutorial will teach you how to sew your very own quilted makeup bag!
I would classify this project as beginner, but it's slightly on the more challenging end of beginner. I only say that because I don't want any beginners out there to get discouraged if it's feeling a bit tough at certain parts. There are just a few elements that may take a few tries. For example, zippers can be a little finicky for any level of sewers! All you need to know is don't worry, you can always seam rip and adjust!
For this tutorial, I have combined two techniques - how to quilt fabric, and how to make a makeup bag. ALL credits for the makeup bag pattern go to Melanie Ham. For measurements, a detailed video, as well as a step-by-step tutorial for the bag itself, please visit and support Melanie's blog and YouTube channel. I do not include measurements on this page as I do not own the makeup bag pattern itself.
Let's talk materials! For this tutorial, you will need:

(2) outer pieces
(2) lining pieces
(1) in pull tab piece
For sizes (small, medium, and large) please visit Melanie's blog post here.
So I got my fabric from my local craft store because I didn't want to have to order any and then wait for it to come in, but here are some cute fabrics that I would totally pick out for the next time I make this project:
I want to try terry cloth so badly with this project! If I make some I will be sure to come back and add photos because I've seen a lot of really cute bags with that material!
By the way, here is what I have found with fabric. If you're not sure how many yards you will need for a particular fabric, you can always use any online yardage calculator. I used the one from Quilter's Paradise. For this project, I found that for each fabric you will need approximately 0.5 a yard for one bag. For example, I used around 0.5 yard of red gingham (outer layer), 0.5 yard of the cherry pink interior, and 0.5 yard of fusible fleece. I found it helpful to write the fabric layout for each bag to see how much of each I needed. For example, red gingham exterior, cherry pink interior, and red zipper.


(2) fusible fleece pieces
This is the fusible fleece I used. One package this size should give you enough for 4 sheets, which makes 2 bags! You could make the bags without this, but this is really what gives it structure and shape. It simply irons onto the back of your outer fabric and enforces it.
(1) 18 in zipper - (I used a 14 inch zipper in this tutorial but I would have liked for it to be longer because you can always cut off the excess)
White thread + matching thread to outer piece for topstitches/quilting - I pretty much used white for everything because I'm lazy and it pretty much worked with all my fabric but if you wanna be fancy you could use red thread for the top stitch and the quilting on the bag I made for example.
I swear by this ruler, especially if you want to get more into sewing! Some of the following materials are not absolutely necessary for this project, but if you want to invest in some things that will make your life a whole lot easier, I definitely love having these sewing essentials.
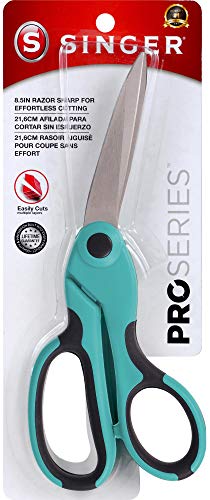
I truly feel like everyone needs a pair of fabric scissors in their life. They're much sharper and can be used for lots of useful things around the house even if you're unsure if you're going to be sewing a lot in the future.
In my photos you can see that I use a purple wheel scorer. I've tried to use washable pens and markers in the past and I just feel that this scorer makes things a lot easier. I got mine for cheap at my local craft store but this one is the one that I was actually looking for. It simply creates a crease in the fabric so you can follow the lines when you're sewing.
If you're going to use a washable pencil, just test a small piece of fabric first. I personally use them on parts of the fabric that are not going to be shown. For quilting I prefer the scorer and for marking measurements on the wrong side of the fabric, I prefer a pencil.
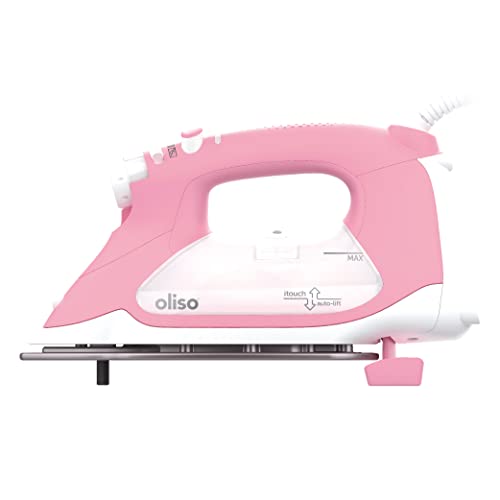
This iron is super recommended by the crafting community! It automatically lifts up so you don't need to keep tilting and untilting. You can also just use a regular iron but if you do a lot of sewing projects this is totally worth the investment.
An ironing mat can help when you don't want to go back and forth between an ironing board and your work table.
This tutorial really combines two separate techniques. The first is how to quilt fabric and the second is how to make the bag itself.
You can also use pins instead of sewing clips, but these clips help to keep certain sections of the bag pulled away so that you don't accidentally sew them. I feel like the clips are easier to use for beginner sewers anyway!
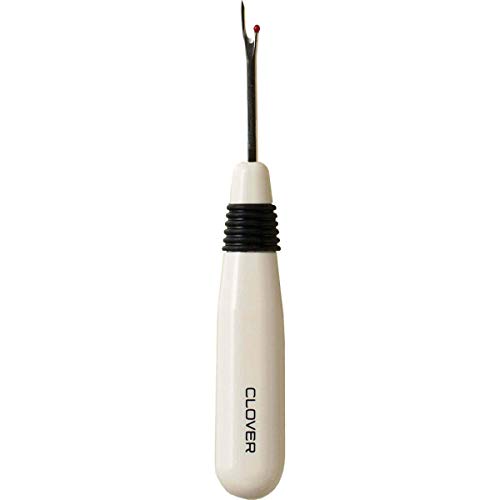
Everyone who wants to start sewing needs a seam ripper. This will help you correct any mistakes you make.
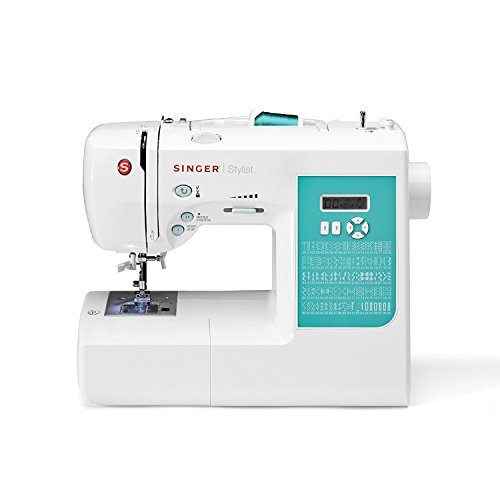
This is the sewing machine that I currently use, and have been using since I started sewing. It is a great machine to sew on and I still haven't felt like I have outgrown it. When it comes to a sewing machine, any machine will work, but if you want a machine that is going to last you a little longer until you are ready for an upgrade, I recommend this one. There are some cheaper machines (around the $50 range) and they will probably allow you to do the basic functions required to sew some beginning projects, I just personally recommend spending a little more up front rather than buying a cheaper machine and then moving to a more advanced model. Think of it this way, it will be cheaper for you up front, but in the end you will be spending more money once you upgrade. That being said, whatever you can get your hands on will work just fine! I used to use my mom's old sewing machine and it was good besides some trouble with the bobbin. Although a sewing machine is an investment, it's one of the coolest tools out there and you can create literally anything with it! Any project will take you more than double the amount of time to hand sew versus machine sew.
Another tip is if you don't know how to sew, and you're not sure where to start, I always recommend just picking a project that you want to complete (like a makeup bag tutorial) and try it!
I bought this kit when I first started sewing and it gave me all the tools I needed in the beginning. It comes with some essentials like a seam ripper and lots of different colors of thread to get you started.
This step is optional depending on the look you are going for. I personally wanted my bag to have quilted top stitching because I feel that it gives the bag a cute touch!
I would like to give a mention to this video for teaching me how to quilt fabric. Feel free to watch for a deep dive into quilting if you're having some trouble, or check out my tutorial below.

As I mentioned before, you will need (2) pieces of the exterior and (2) pieces of the interior as well as (1) piece of whatever fabric you want your pull tab to be. I usually use the exterior fabric for the pull tab so it all matches. Also cut out your (2) fusible fleece pieces.


The fusible fleece is really easy to put on. When you open the package you will see that one side is relatively smooth and the other has little dots. The little dots are the glue dots that will allow your fleece to attach to your outer pieces. Place your fusible fleece on the ironing board, dots side up. Then place your exterior fabric piece lined up with the fusible fleece, right side facing up. Iron these pieces together, ensuring that it's glued down on all sections. Repeat on both pieces of exterior fabric only (not the pull tab piece or the interior pieces).


This part is a little tough to explain, but basically you are going to take your ruler and lay it across your exterior fabric piece at an angle. Where you put it doesn't really matter, but wherever you start and whatever your angle is, you're going to use your first line as a guideline. Try for about a 45 degree angle. I used a scorer for this part (the purple wheel thing) but you could also use a washable pencil. Just keep in mind this is the outer piece of fabric so whatever you do on the exterior part will show.

The line is kind of hard to see here but in natural light it's easier to tell. Line up your ruler parallel to your line (in the photo above it's lined up perpendicular to show that you will want to measure 2.5 inches from the guideline to your next line) and make another parallel line 2.5 inches from the guideline in either direction. Keep making these lines until you run out of fabric and then flip the fabric around to make parallel lines that will intersect the previous lines you made at a 90 degree angle. Basically you will be creating lines that will end up looking like quilt squares!

Now sew on top of your lines. In this photo, I tried a method of following the line with my presser foot and it worked, but for all future bags I have been sewing directly on top of the line, just because it looks a little cleaner.

This is sort of what you will end up with for the quilted top pieces. On my next few bags I made sure the angle between the lines was closer to 90 degrees. These turned out more like diamonds but you can't really tell with the finished bag. I personally like my top stitching to have a longer stitch length, so that's what I did here. The nice part about this is it doesn't have to be perfect. When the bag is all done you won't really be able to see the mistakes.
Here is where we construct the bag itself!
I would again like to mention Melanie Ham's video which taught me how to create a zippered pouch. If you are having trouble and want to watch a video version of this tutorial, please feel free to watch hers here. She also has measurements to all sizes of bag available, so be sure to check out her channel here and her blog post here. I will not share sizing for the makeup bag here as the pattern credit belongs to Melanie.
If you would like to see how my process turned out, I have included the steps below:


Start with one piece of exterior fabric right side up. Place zipper face down and in the middle top of your exterior piece.


Place one lining piece right side down on top of your zipper. Line these pieces up and clip with sewing clips to keep in place.

Mark 1/2 an inch in from the edge of the fabric on both sides.

Put your zipper foot (included with most sewing machines) on your machine.

Carefully sew along the edge, using the zipper foot to trace along the outside edge of your zipper starting and stopping at the half inch marks you made. Make sure to backstitch at the beginning and the end so you don't have any loose threads. Do not force the zipper foot too close to the zipper. If you sew on top of the zipper you can damage it (the very first time I tried this I had to run out and buy a new zipper). Try to just gently sew right on the middle between the zipper and the edge of the fabric.

Now place your other exterior piece right side up on the table. Line up the exterior piece with the zipper face down. Place your other interior piece right side down.

Make your 1/2 inch marks on both sides again. Sew right along the zipper using your zipper foot to trace, same as you did with your first pieces. Press open with your iron.


This is what you should end up with.

Switch back to your regular foot.

Make your 1/2 inch measurements on the top, make sure you use something erasable on this part.

You will now make the top stitch for the zipper part of the bag. This will show so make it as straight as you can. To help you, line up your presser foot with the zipper. Now move your needle all the way to the left. You do this by pressing the left arrow on your machine. This will make your stitch more uniform and straight on both sides. Start and stop at the marks you made and make sure to back stitch on both sides. Repeat on both sides of the zipper. Be sure not to accidentally sew the lining fabric underneath all wonky. I did that once and had to seam rip the whole thing. Just keep your fabric all lined up and straight and you'll be good to go!


Sew the long ends closed with a 1/2 inch seam allowance. Basically line up the edge of the fabric with the 1/2 inch line on the sewing plate and sew along that line. You can also measure 1/2 an inch from the edge, make a mark, and move your needle to line up with your presser foot on the edge.


You are going to do the same with the lining, but you need to leave a few inches in the middle open so you have the ability to turn the bag inside out. Make sure to backstitch to make your threads tight. Sew the top part, leave a few inches and sew the bottom part.

Press your seams open to look like this on both sides.


Press your pull tab with your iron to look like this. Here I accidentally used my lining fabric instead of my outer fabric. I ended up going back and changing it because I wanted it to match the exterior, but if you want a mix and match look, you can use the lining for a fun pop of a different color on the outside. Whatever you choose to use just remember it will be on the outside of the bag.

Top stitch both sides on the pull tab. Take your pull tab and cut it in half.


Now you are going to sew the sides of the bag closed. Do the end with the bottom of the zipper first. Place the tab inside the side opening with the raw edge hanging out. Put it in as far as you want the tab to hang out of the finished bag. Sew down the side of the bag with about 3/8 inch seam allowance. Measure 3/8 of an inch from the side of the bag and make a mark. Move your needle to the mark and now you have a 3/8 inch seam allowance. Sew all the way down and go over the zipper a few times, avoiding any metal in the zipper. The zipper I used here was a little too small honestly so I had to be careful. Try not to sew the lining fabric for this step.


Flip to the next side. Unzip the zipper a few inches and use a sewing clip to keep the zipper lined up as you sew over it. Sew the lining fabric with the same 3/8 inch allowance. Try not to sew the exterior fabric when you get to the zipper part. This is challenging. Try to lift the exterior fabric up and sew slowly when you get to the zipper. SEW OVER THE ZIPPER AND THE LINING, AVOIDING THE EXTERIOR FABRIC. Do the best you can here.

Trim the excess zipper on each side.

Measure 2.25 inch squares from the edge of the bag and the seam on top for all 4 corners of each fabric (interior and exterior). For example, you will have 8. squares of fabric when you're done.


Cut each square out, you should have 8. Cut each individually making sure not to accidentally cut the layer beneath.

Pinch the sides of the opening together and sew down the line, making sure to backstitch. Do this with all 8 corners.

Your bag should be looking like this, pretty messy and crazy! Flip it inside out using the hole we left in the lining, and like magic...

It should look something like this! Sew this opening closed with a little topstitch and you're done!


Look at how cute the final product is! I like this size because it's big enough to hold all my makeup. I think this turned out great!

I made a few other bags in different fabric! If I make anymore I will come back and post some photos! They also make great gifts, I made one for my mom for Mother's Day and she loved it!